
User's guide
Getting started
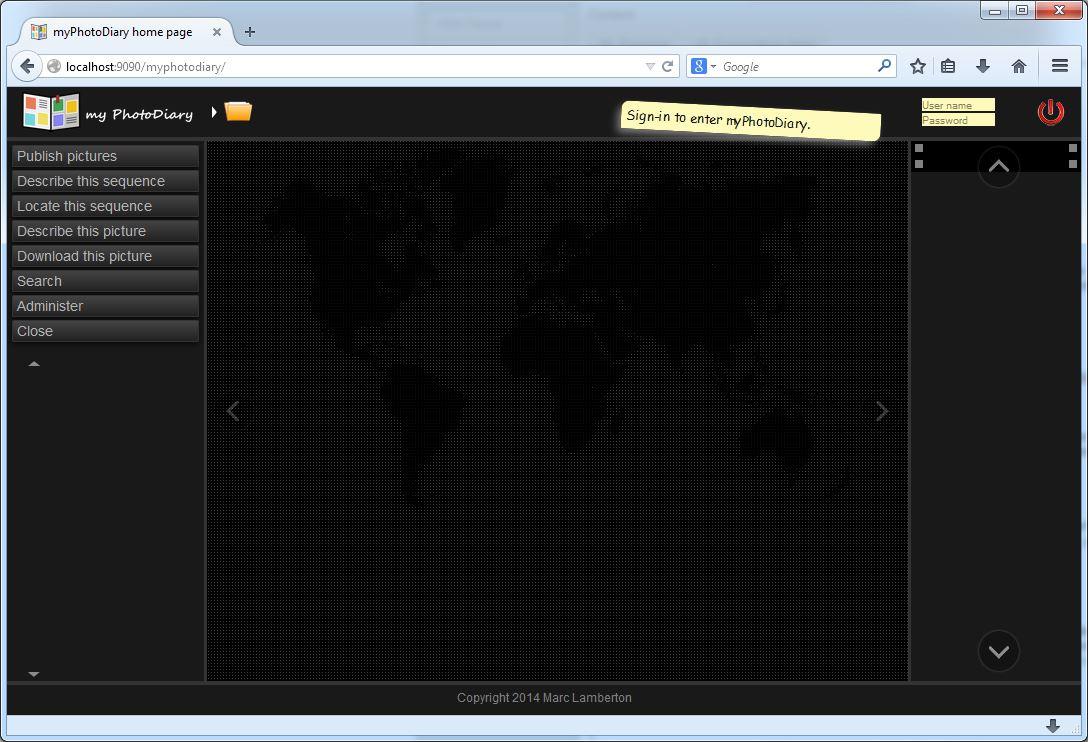
The application launcher starts a web browser which displays the application home page: http://localhost:9090/myphotodiary. As long as you are not logged in, it looks like this:
The first login
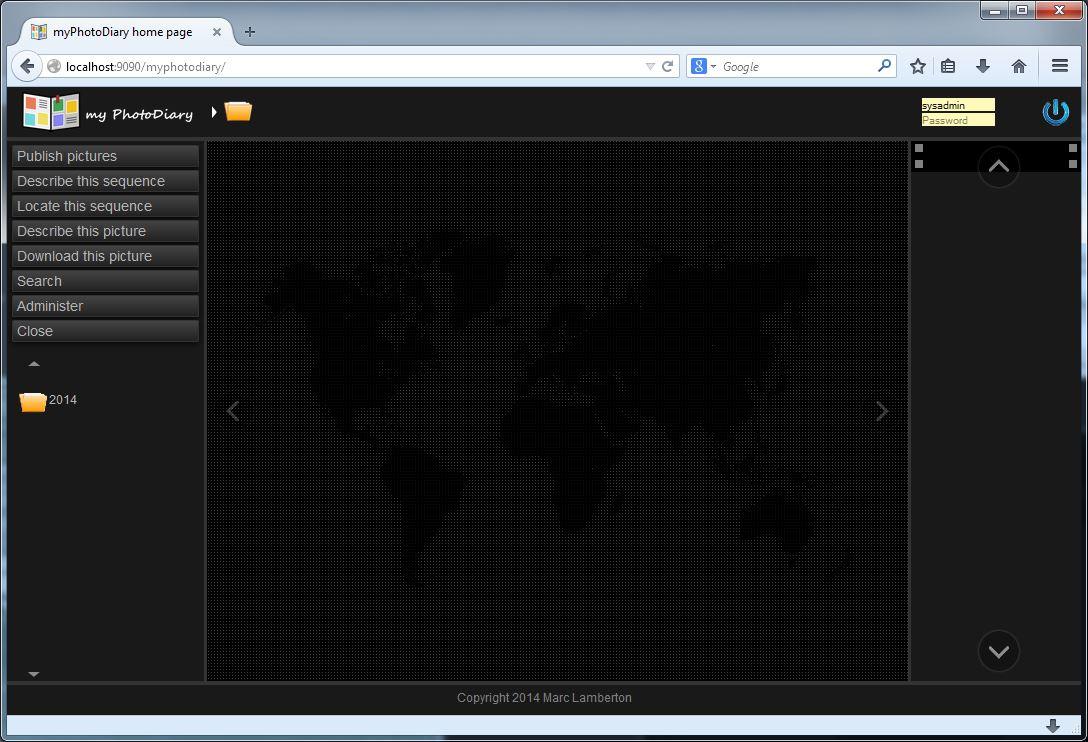
The first time you can login either with sysadmin or with anonymous account (and no password),
then click on the red power-on switch on the top right corner.
When you are logged in, the power-on switch becomes blue.
Once you are logged in, you can see your image folders on the left-side pane. The first time you start the application you will see sample pictures that we have added to help you play with the application. For instance click on the left-side: on folder "2014", then folder "11", then folder "animals". It should display
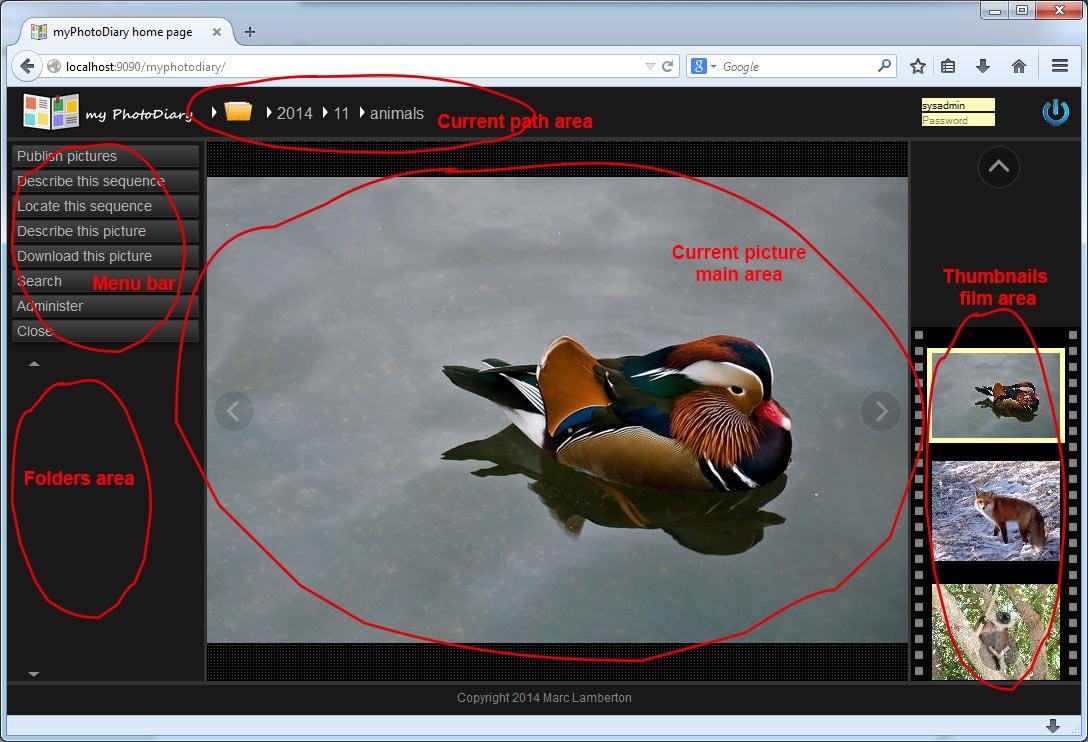
The screen contains different areas:
- The left-side pane contains a menu bar and a list of folders. You can click on a folder to open it and display its content.
- The top bar contains the path of the images sequence which is currently displayed.
- The right-side pane contains a photographic film of thumbnails images. It contains all the images of the current sequence of pictures. You can click on them, or scroll them with the up and down arrows.
Navigation and pictures browsing
You can browse your images by clicking on folders on the left side. The current path is display on the top of the page,
near the application logo. Each folder which contains pictures is called a "sequence".
As you can see below, the folders are structured per year/month/sequence, for instance:
2014 / 11 / Animals
This is not mandatory but highly recommended. In particular the picture publish feature will try to automatically sort
pictures according to that sorting schema.
When you are in a sequence of images, you can scroll them with the left and right arrows of the keyboard.
Or click on the arrows which are on the left and right side of the main picture area
If you place you cursor on the top part of the main image, you highlight a hidden button bar. From the left to the right it displays three icons: "Delete": it opens a confirmation popup window to delete the current picture. Note that you can only delete an image if you have the necessary rights. "Play": it automatically plays a slideshow. You can specify the slideshow delay in the "Administer/Configuration" menu. "Full screen": it switches to the full screen mode (if your web browser supports full screen). To return to the normal mode, click again on the same icon on the top right corner of the screen

Read picture comments
If you place the cursor just below the navigation buttons, you highlight a "Post-it" where you can read two sections: the top section describes the whole sequence, and is common for all pictures of the sequence. The bottom section describes the current image.

Write picture comments
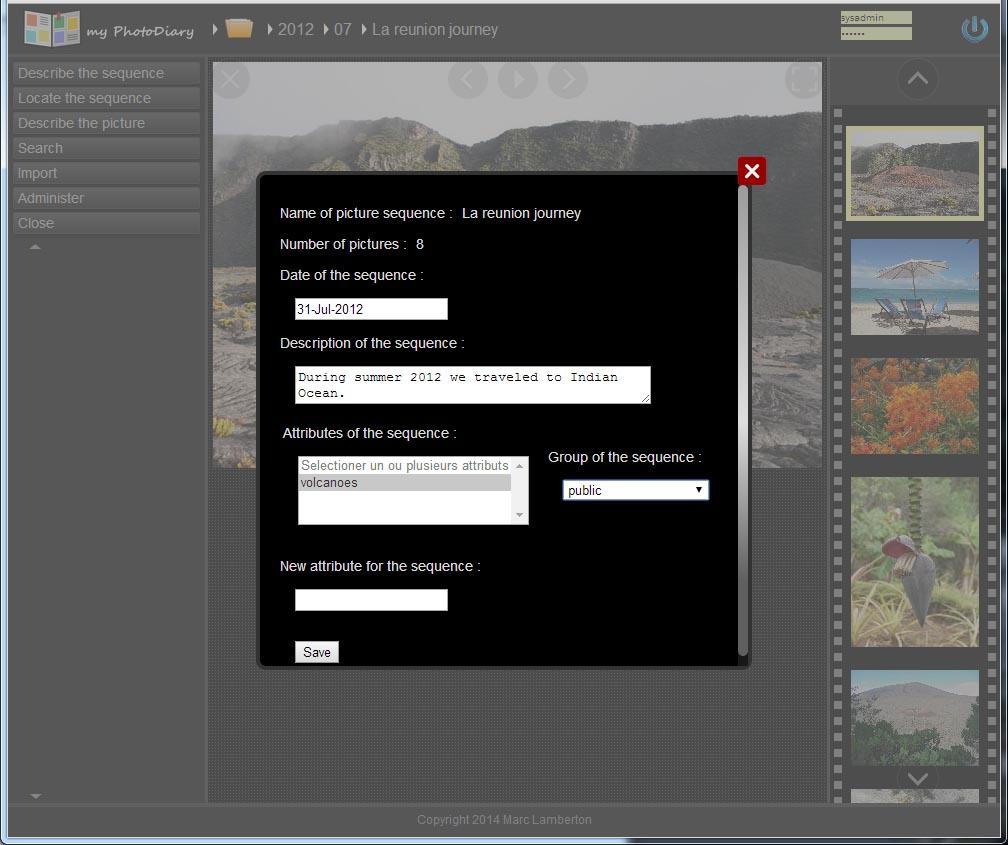
If you move the cursor on the top Post-it section (or the upper horizontal line when there is no text), the cursor displays a small pencil, click on it. A popup window appears to let you edit the sequence description:
- you can give it a date (it is usually automatically dated)
- you can type a description
- you can define sequence Themes which are simple keywords very useful to query the database of pictures
- By default the sequence is public, but you can place it into restricted groups (see the user management section).
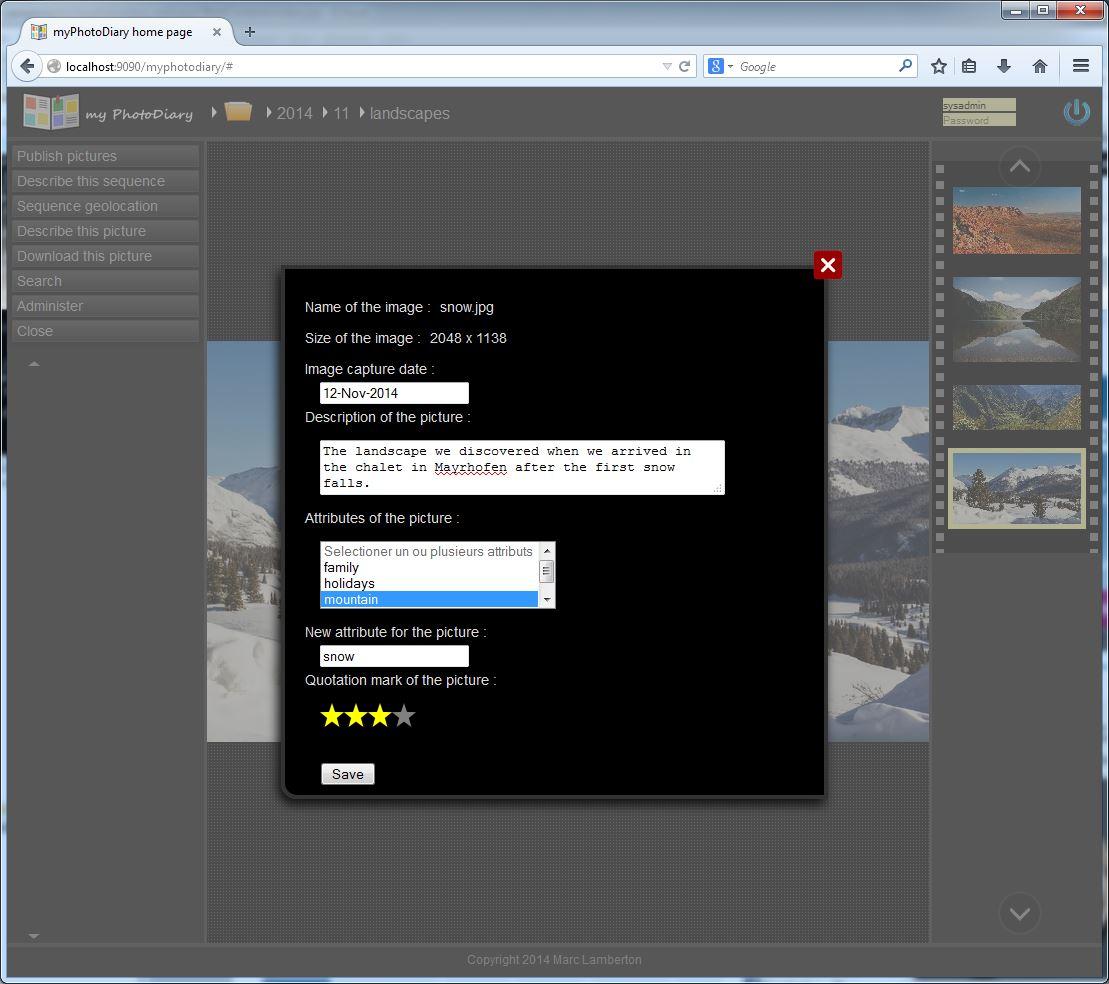
If you move the cursor on the bottom Post-it section (or the lower horizontal line when there is no text), the cursor displays a small pencil, click on it. A popup window appears to let you edit the current image description:
- you can give it a date (it is usually automatically dated with the image EXIF data)
- you can type a description for the current image
- you can give a quotation mark to the picture from one to four stars
- you can define image Themes which are simple keywords very useful to query the database of pictures.
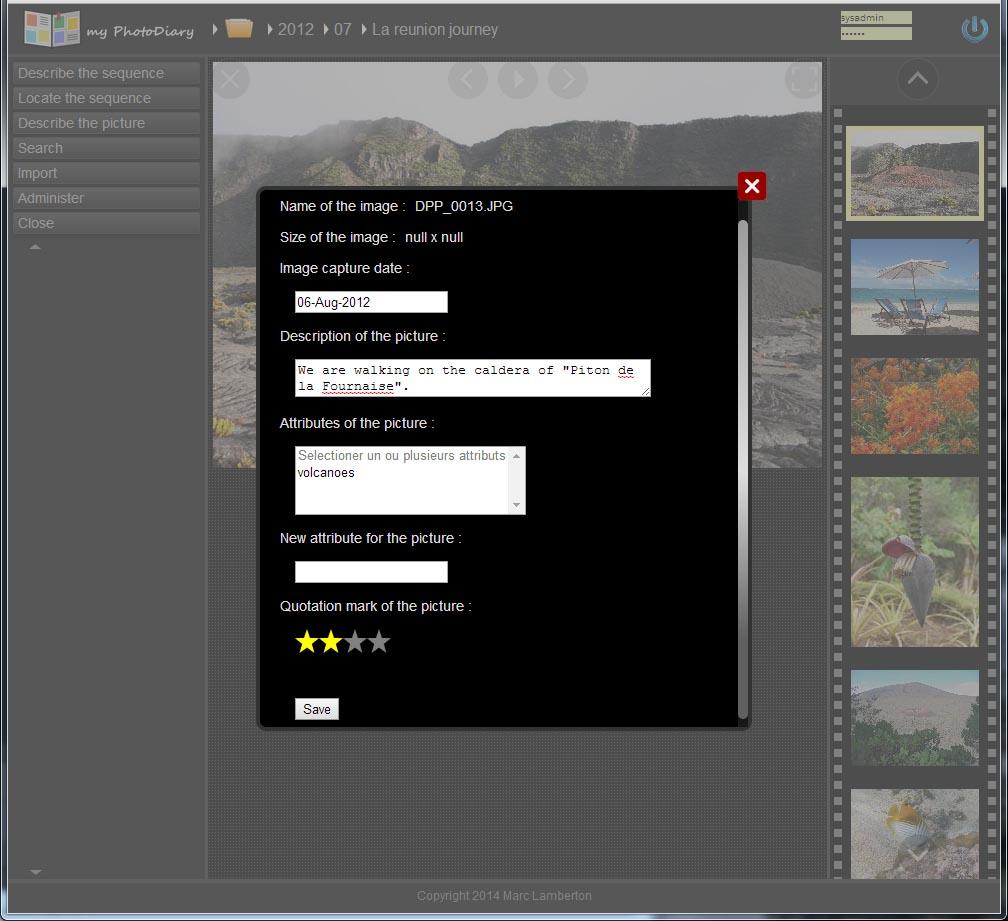
To open the edition popup window, you can also click on the "Describe this picture" button on the vertical menu bar.
Picture sequence geolocation
If you click on the left-hand side menu button: "Locate this sequence", it opens a popup with a map. You can place a marker which automatically saves the geolocation into the database.

If your camera sets the geolocation information in your pictures EXIF data, myPhotoDiary automatically get it. When you open the map the geolocation marker is already positioned(*). In the next paragraph we explain how to publish new images.
(*) Available in a future release
Publish images from a PC
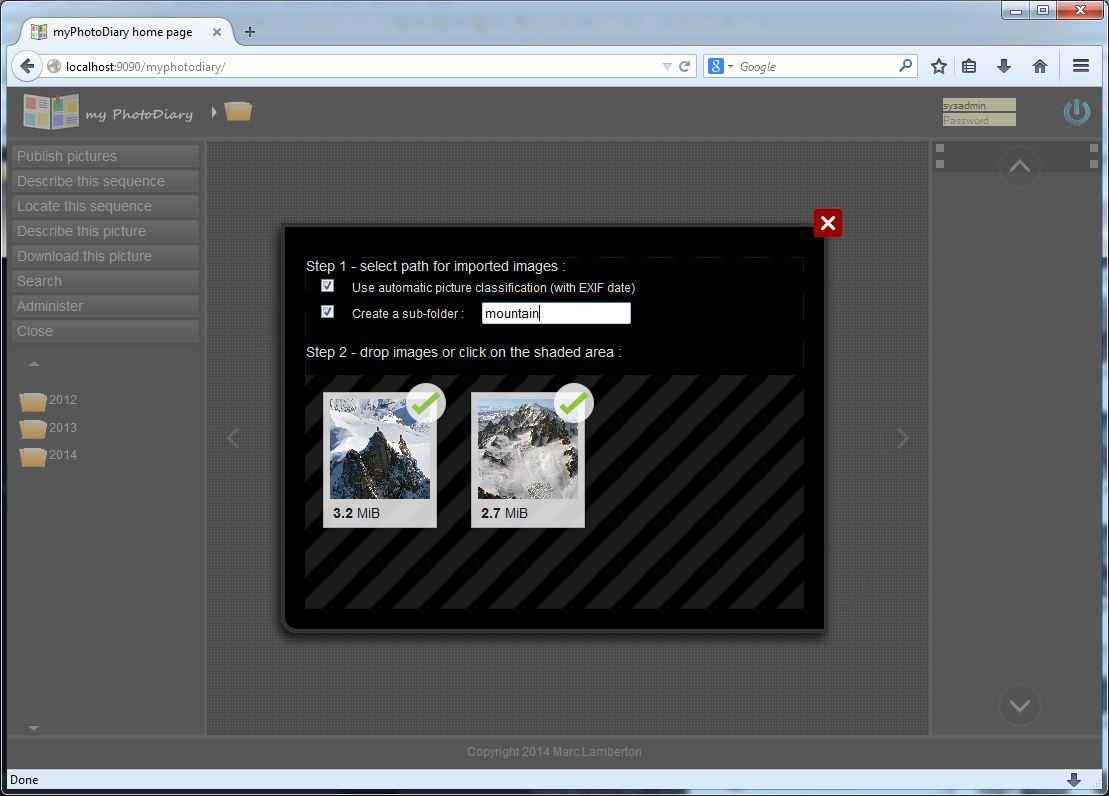
With myPhotoDiary, you can easily publish and sort your pictures. Assuming you have transferred your new pictures into your computer, just click on the "Publish pictures" button from the menu bar. An image drop area appears:
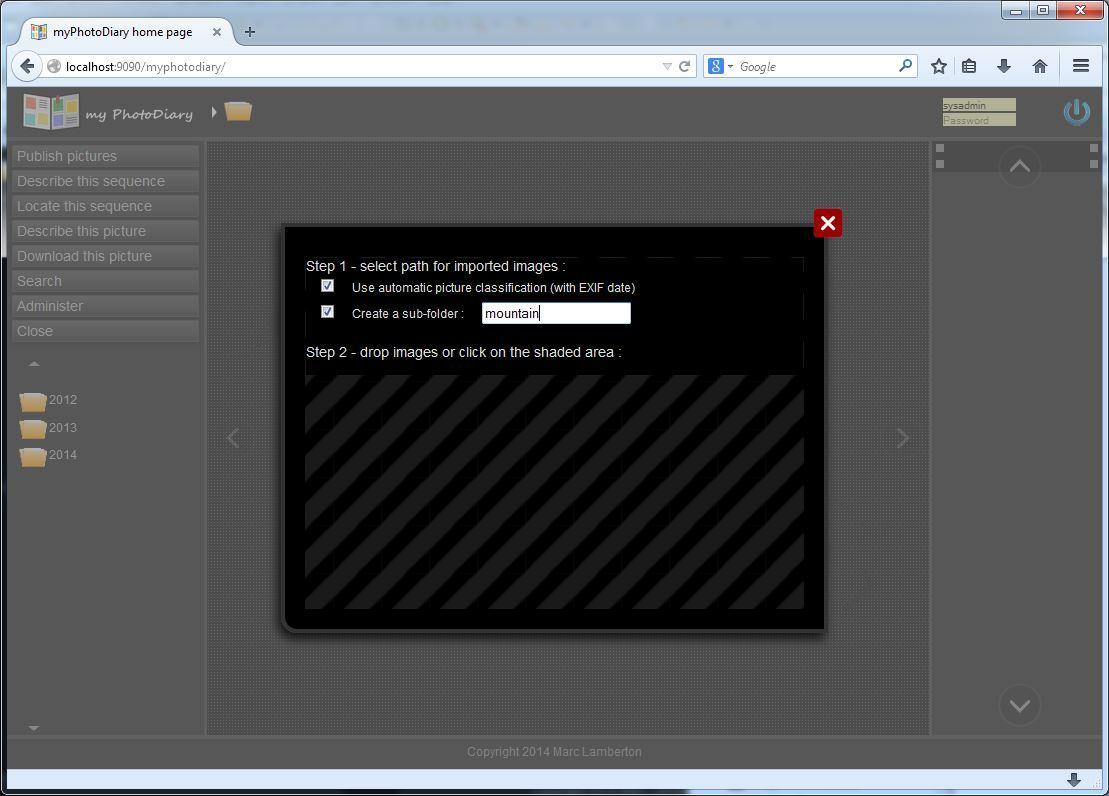
Select the sorting options: by default both options are checked:
- Use automatic pictures classification (with EXIF data) means that myPhotoDiary automatically creates folders (year/month) to store your images according to the EXIF data they contain. If your images come from a digital camera or a smartphone, use this default option.
- Create a sub-folder. Give a name to the sequence of pictures you are publishing. MyPhotoDiary will automatically creates folders (year/month/sequence name) and move your pictures there.
Publish images into an existing folder
If you un-check the options Use automatic pictures classification (using EXIF data) and Create a sub-folder,
your images will be stored into the sequence which is currently opened (whose path is displayed on the top bar).
For instance below we publish one new picture into the 2012/02/mountain sequence which already contains two other pictures.
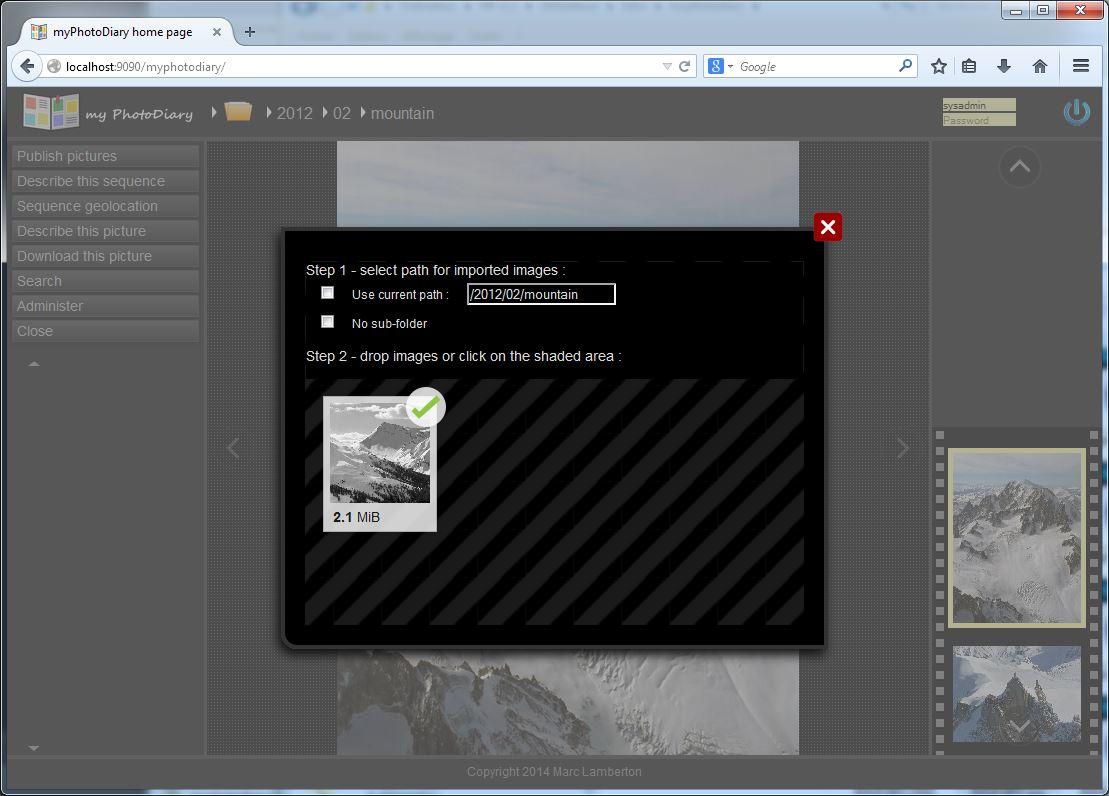
You may also specify a sub-folder name to create a new sequence. In the latter case, myPhotoDiary will then prompt you to describe that new sequence:

Note that you can directly drop an entire folder of new pictures to publish. Anyhow we recommend to publish one sequence of pictures at a time. A sequence can be one photo shoot, one trip, one family event,... Always give a short but significant name to your photo sequences. After image sequences are published, you can comment them.
Search images
MyPhotoDiary provides a powerful search tool to find pictures. It uses the following search criteria:
- The picture capture date
- The picture quotation mark
- The picture themes
Just click on the left side menu bar button Search. A popup window opens where you specify you search criteria
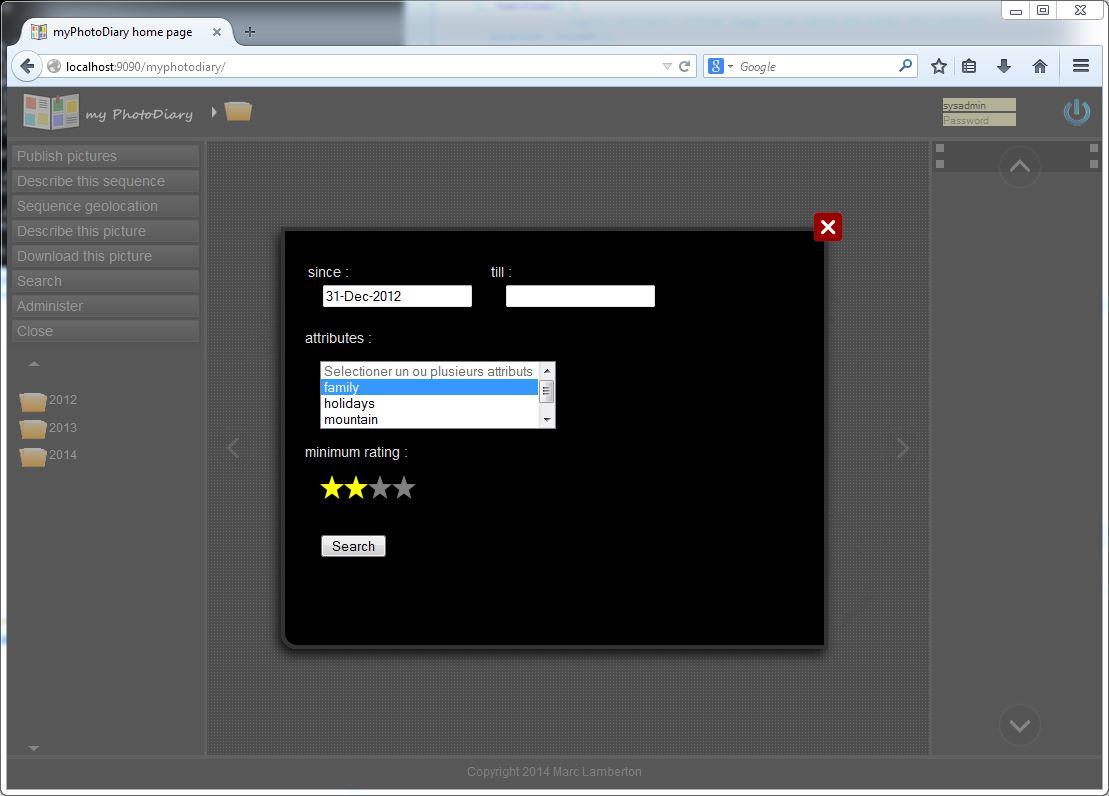
Then click on the Search button of the popup window and it will display a new sequence of pictures with the requested criteria. That new sequence of picture is not persisted: it only lasts the time you browse it. It is also possible to search for pictures taken before a certain date or between two dates.
Search by themes
Themes are simple keywords that you define once to help you sort your pictures: for instance family, holidays, sport are themes. When you comment a picture, or a sequence of pictures, you can sort them in one or several existing themes, or you can also create a new theme for it. For instance when we comment the picture below, we sort it the theme mountain and in a new theme snow.
After it is saved, it will then be possible to search for pictures with any of these themes. If you specify several themes in the search criteria, it displays all the images having all these themes: each theme of the criteria narrows down the list of displayed images.
Administer themes
The themes are keywords that you associate with pictures, or sequence of pictures in order to ease later picture look-up. You can define your own themes according to the types of pictures you are taking.
Themes hierarchy
You can also define an theme hierarchy: for instance if you like sport you can define a sport theme. Then if you like several sports you can define as many sub-themes, for instance: football, tennis, golf and ski.
sport
  |
  +--- football
  +--- tennis
  +--- golf
  +--- ski
When you comment a picture, you can give it the golf theme and it will automatically inherits the sport theme as well. Then, if you search later for that picture, you could either look-up for golf or for football pictures.
Administer themes
On the main page of myPhotoDiary, click on the administer button. It opens a second window or tab with a new menu bar. Click on the Administer themes button and you get the following screen:
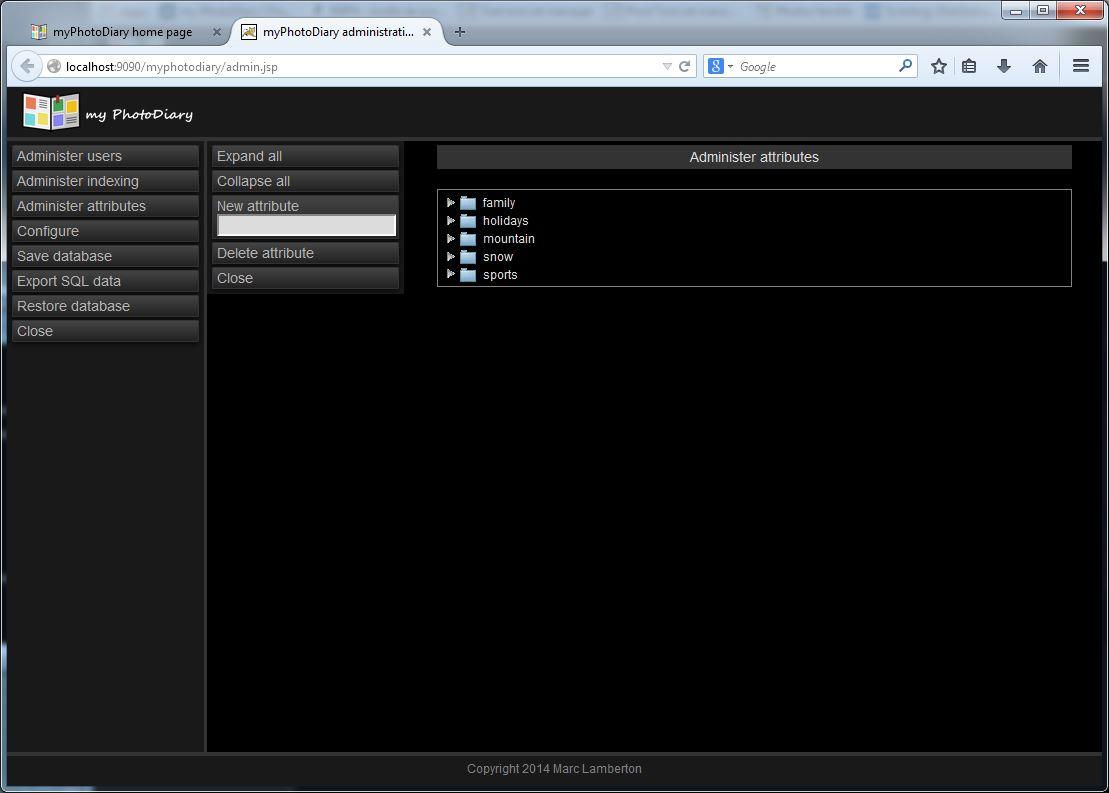
You can use that screen to create new Themes: fill-in the attribute name football and click on the New attribute button. The new attribute automatically appears in the list of Themes and is now available in the database. You can similarly create the tennis, golf and ski themes.
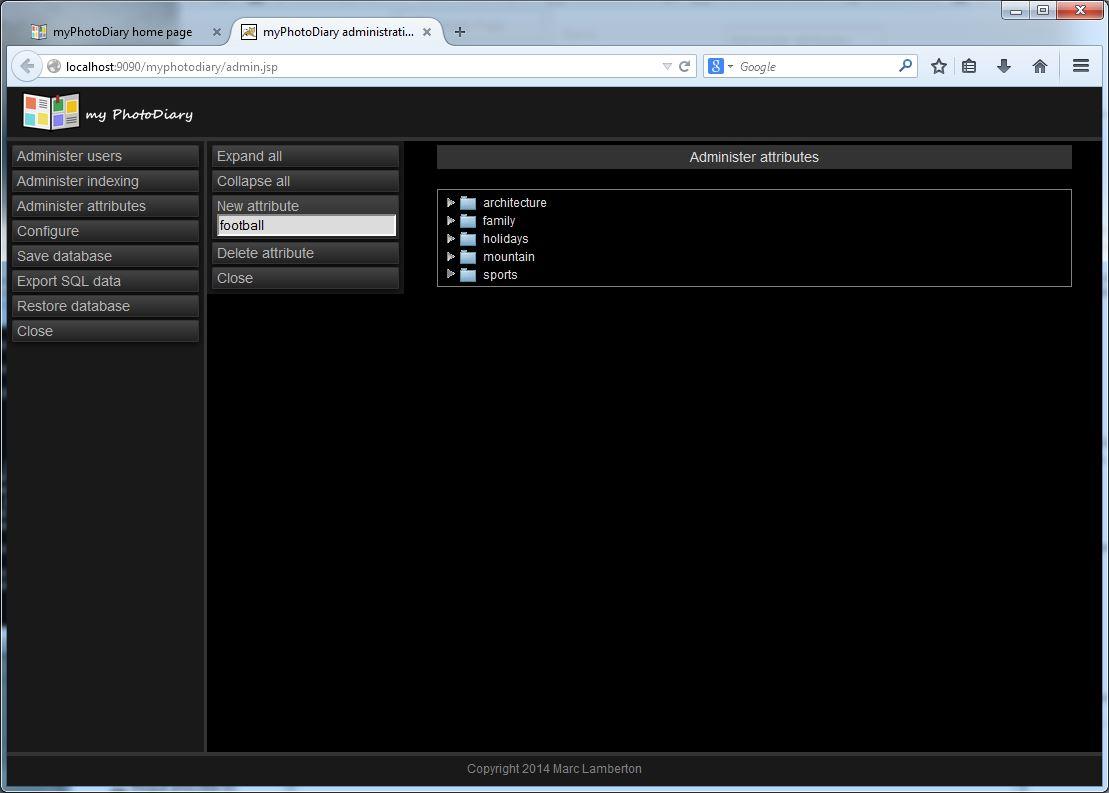
Then you can drag and drop these four new attributes below the sport attribute in order to build the attribute hierarchy.
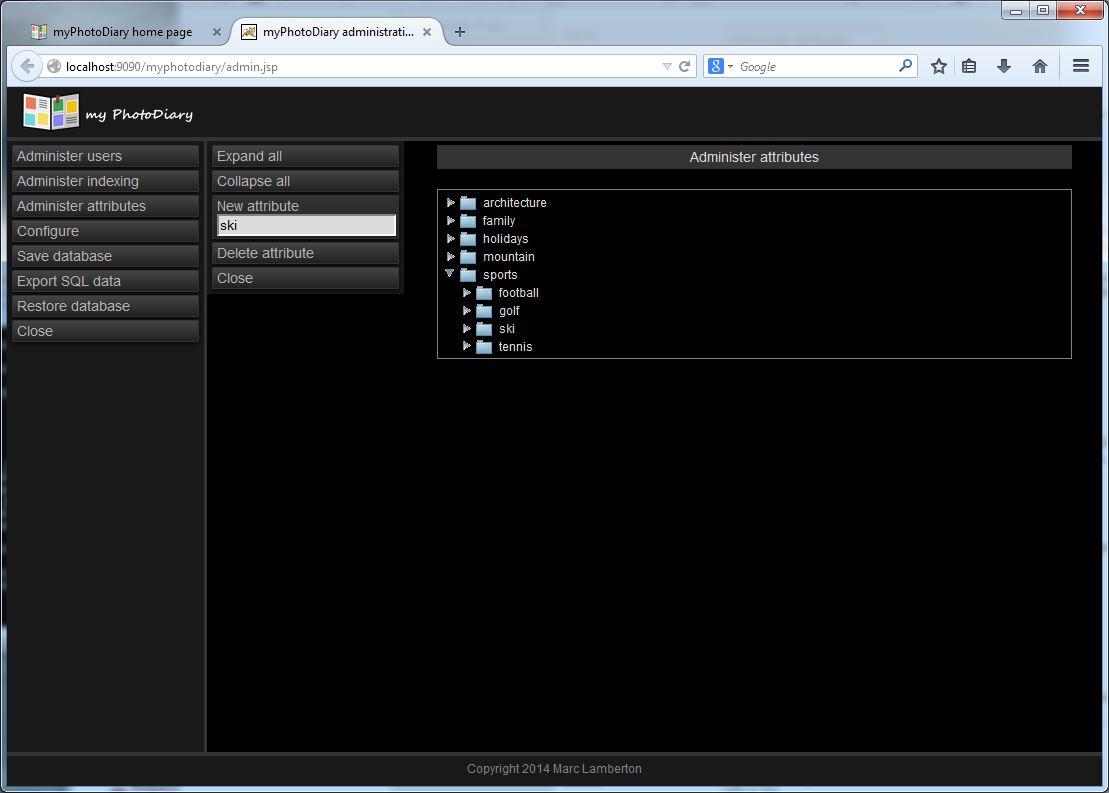
The attribute administration screen also provides buttons to:
- Delete an attribute: select it, then click on the Delete attribute button.
- Collapse or expand the attributes hierarchy.
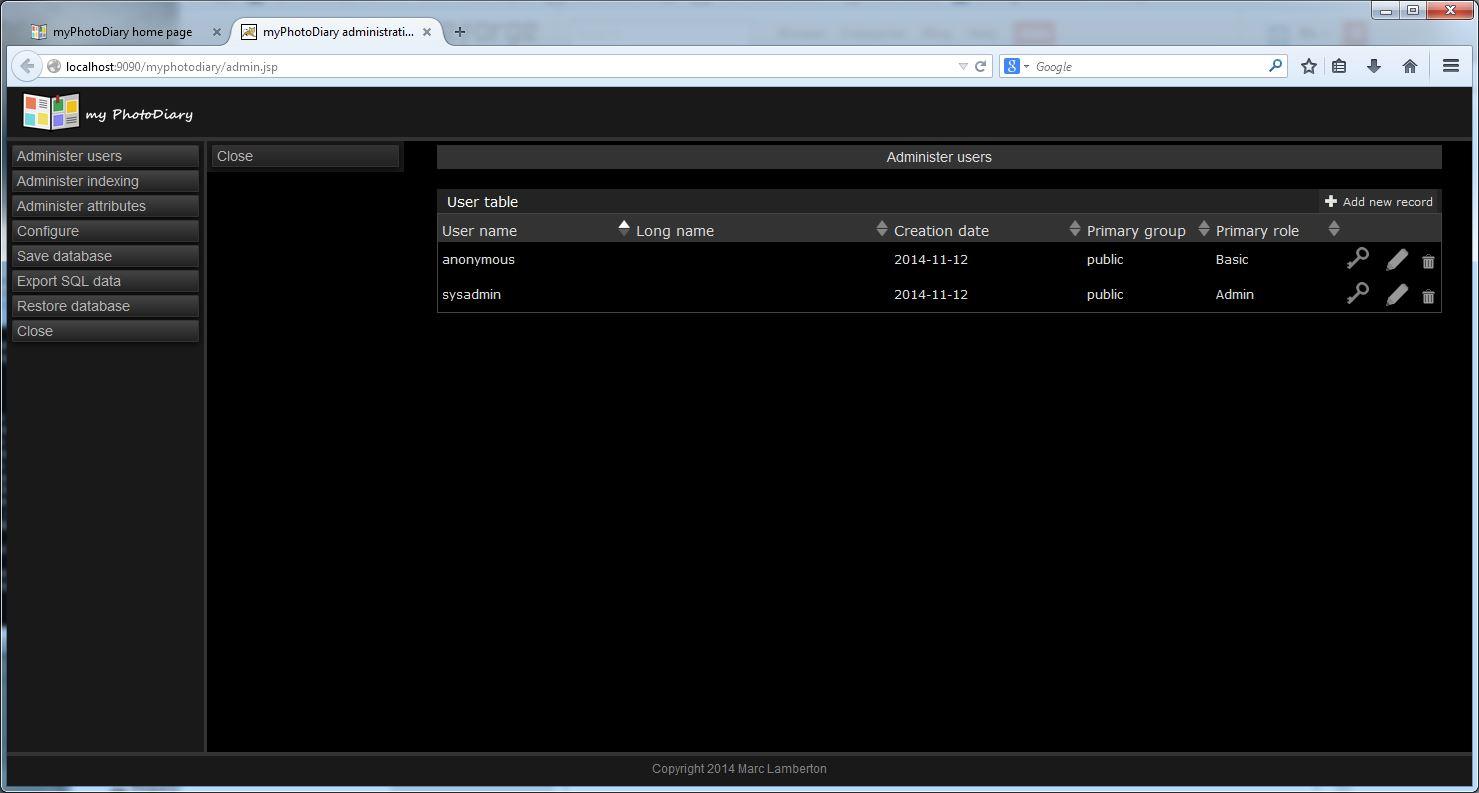
Administer users
On the Administer page, click on the Administer users button. It displays a table of users. By default myPhotoDiary defines two accounts with no password:
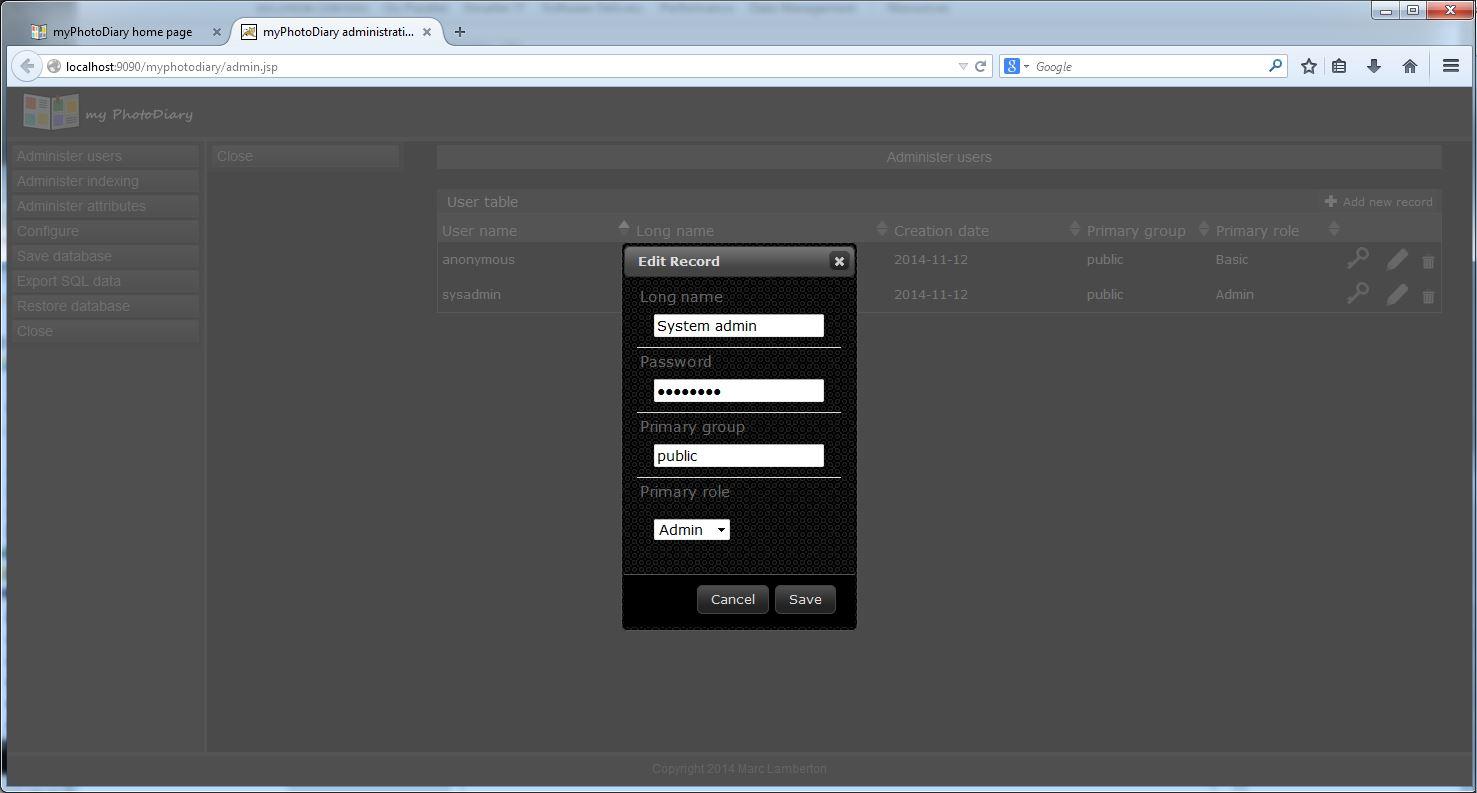
We recommend you to give a password to the sysadmin account: click on the pencil icon on the right side of the users table. It opens a popup window to edit the account data:
- The account long name
- The account password
- The account primary group: by default when that account creates a new sequence of pictures, it belongs to that group, unless you specify a different group name.
- The account role for its primary group.
Access control administration
An account can have the following access control roles:
- Basic role:
- the user can only browse the "public group" pictures
- Reader role:
- the user can only browse pictures
- Writer role:
- the user can browse and comment pictures
- Admin role:
- the user can also add or delete pictures and create new sequence of pictures.
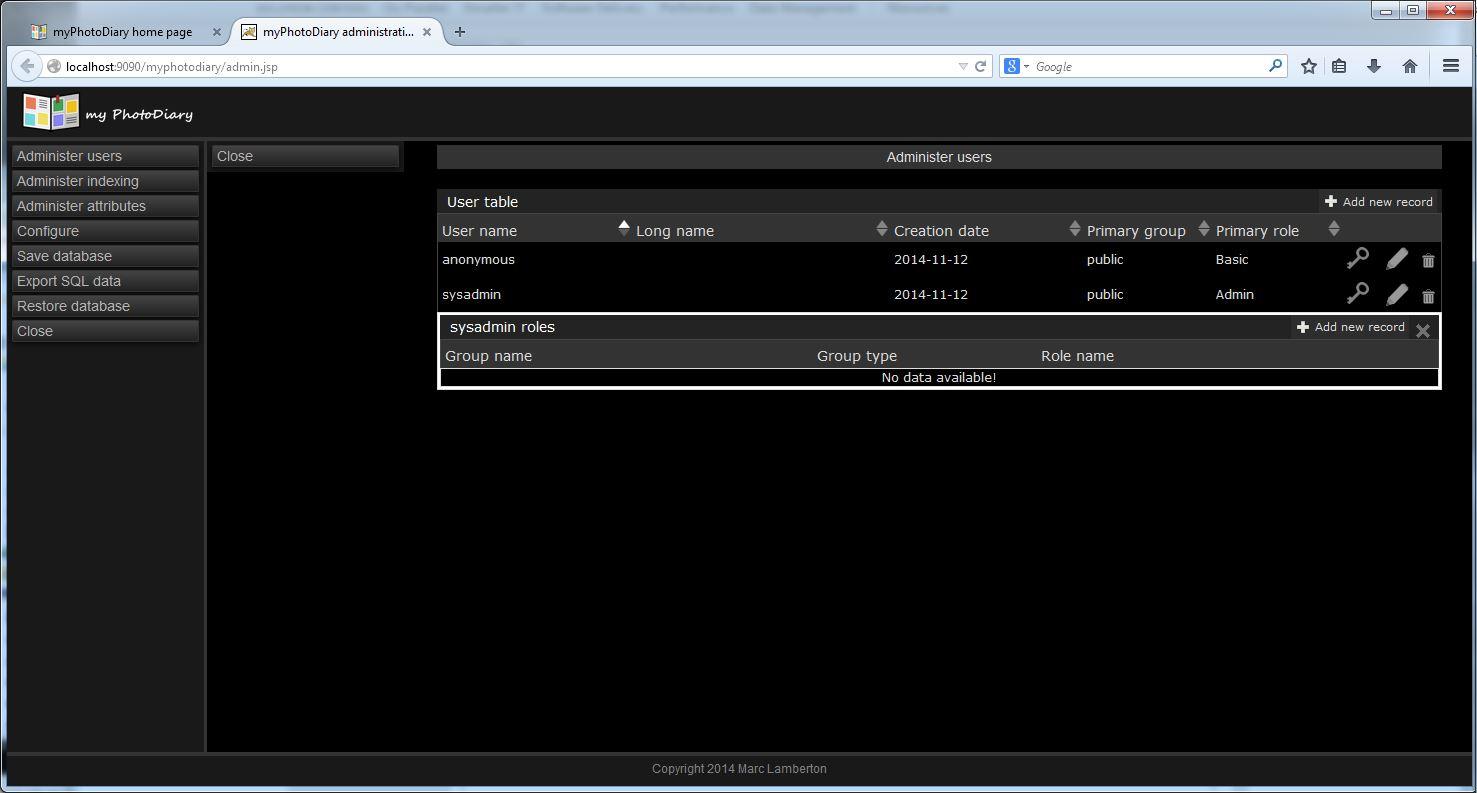
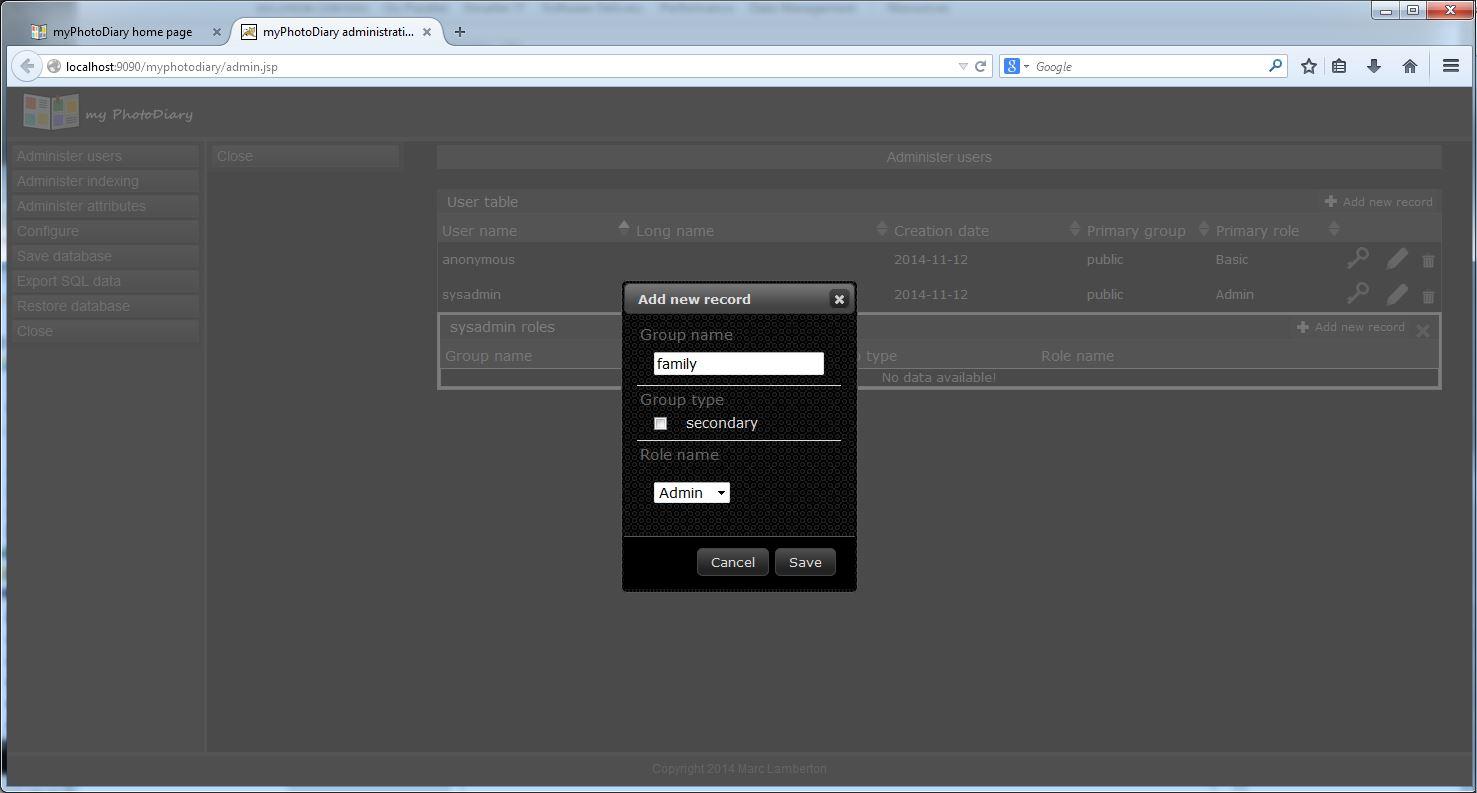
A user role is always related to a group of pictures. A user can be Reader for family group pictures and Admin for public group pictures. When you create a sequence of pictures, you can also define its group. By default when you install myPhotoDiary, the public group is automatically created and it is the default group for every picture that you publish. To define accounts role, click on the key icon in front of that account. It expands the list of secondary groups for that user account. The first time that list is empty:
On each role entry, you can click on the pencil to edit the role, or click on the trash icon to remove that role. If you click on "Add new record" you will open a pop-up to grant a new role to that user. With that pop-up you are invited to fill-in:
- Groupe: the name of the group of images for which this role applies
- Secondary: a check box to click
- A drop-down menu with the four possible roles: Basic, Reader, Writer or Admin.
Administer image database index
 Under work.